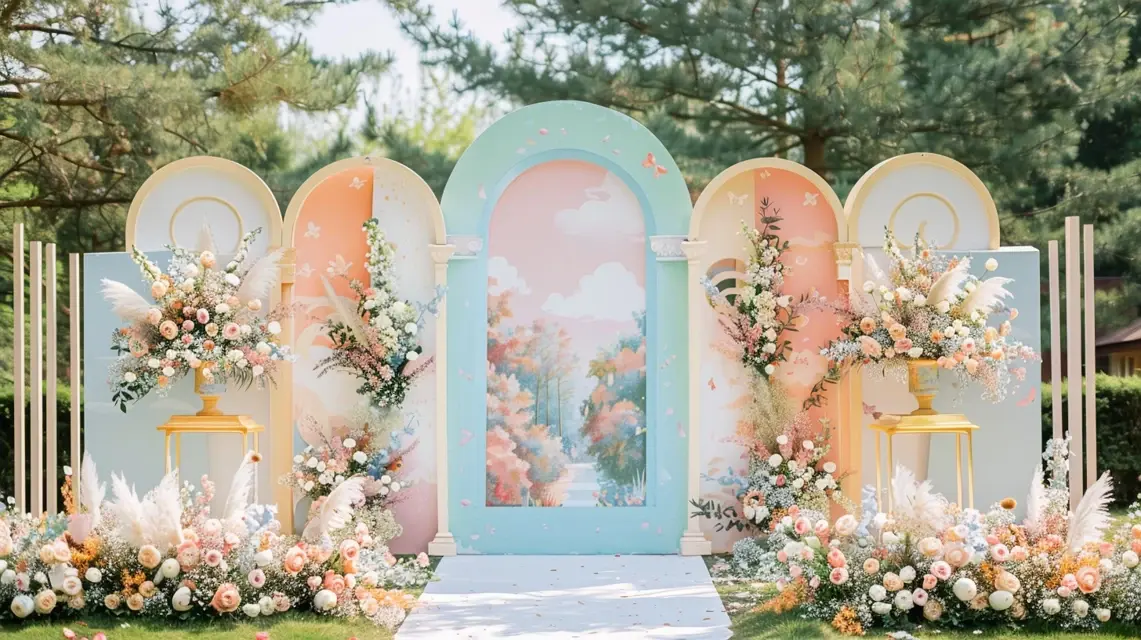
DIY Painted Arch Backdrop Stand for Spring Events
Spring is the season of renewal, color, and fresh beginnings—making it the perfect time to style a DIY painted arch backdrop stand. Whether for weddings, garden parties, or seasonal photo shoots, a painted arch adds personality and vibrancy to your event. With a little creativity, you can turn a plain frame into a centerpiece that captures the spirit of spring.
Why Paint Your Arch Backdrop Stand?
Painting your backdrop stand is an easy way to customize it without relying on heavy fabrics or complex décor. Benefits include:
- Seasonal Style: Bright colors reflect spring themes
- Personalization: Match event color palettes and motifs
- Budget-Friendly: Paint is often cheaper than renting or buying new décor
- Reusable: Repaint for different seasons or events
Materials You’ll Need
- Arch backdrop stand (wood, metal, or PVC)
- Primer and acrylic or latex paint
- Brushes, rollers, or spray paint cans
- Stencils for floral or geometric patterns
- Sealant for weather protection if outdoors
Spring Painting Ideas
1. Pastel Ombre
Blend pastel tones like lavender, mint, peach, and sky blue into a gradient for a soft, dreamy spring look.
2. Floral Motifs
Use stencils or hand-paint flowers such as tulips, daisies, or cherry blossoms to give your arch a garden-inspired feel.
3. Bold Color Blocking
Paint large panels of contrasting spring colors—yellow, coral, or teal—for a modern and vibrant backdrop.
4. Nature-Inspired Patterns
Incorporate painted vines, butterflies, or abstract leaves for a whimsical outdoor effect.
Step-by-Step Guide
Step 1: Prep the Stand
Clean and sand the surface. Apply primer to ensure the paint adheres smoothly and evenly.
Step 2: Apply Base Color
Choose a solid pastel or neutral base coat. Let it dry completely before adding designs.
Step 3: Add Patterns
Use stencils for clean lines or freehand designs for a more artistic touch. Apply multiple coats if needed for brightness.
Step 4: Seal the Paint
Protect your work with a clear sealant, especially if the arch will be outdoors in variable spring weather.
Step 5: Style the Arch
Enhance the painted design with complementary decorations like potted flowers, string lights, or a spring banner.
Tips for Success
- Stick to 2–3 colors for a cohesive look
- Test paint shades on a scrap piece before committing
- Incorporate lightweight accents that won’t hide painted details
- Repaint the stand after each season for year-round versatility
Where to Use a Painted Arch in Spring
A painted spring arch is perfect for:
- Garden weddings
- Spring birthday parties
- Community festivals
- Outdoor photo shoots
Next Steps
Want to expand your creativity? Explore our guides on seasonal arch décor and DIY floral styling to pair with your painted backdrop for even more impact.
Conclusion
A DIY painted arch backdrop stand for spring events is a simple yet effective way to celebrate the season with style. From soft pastels to bold blooms, your painted designs will create a stunning centerpiece that embodies the joy and renewal of springtime.
