DIY Painted Patterns for Arch Backdrop Stands
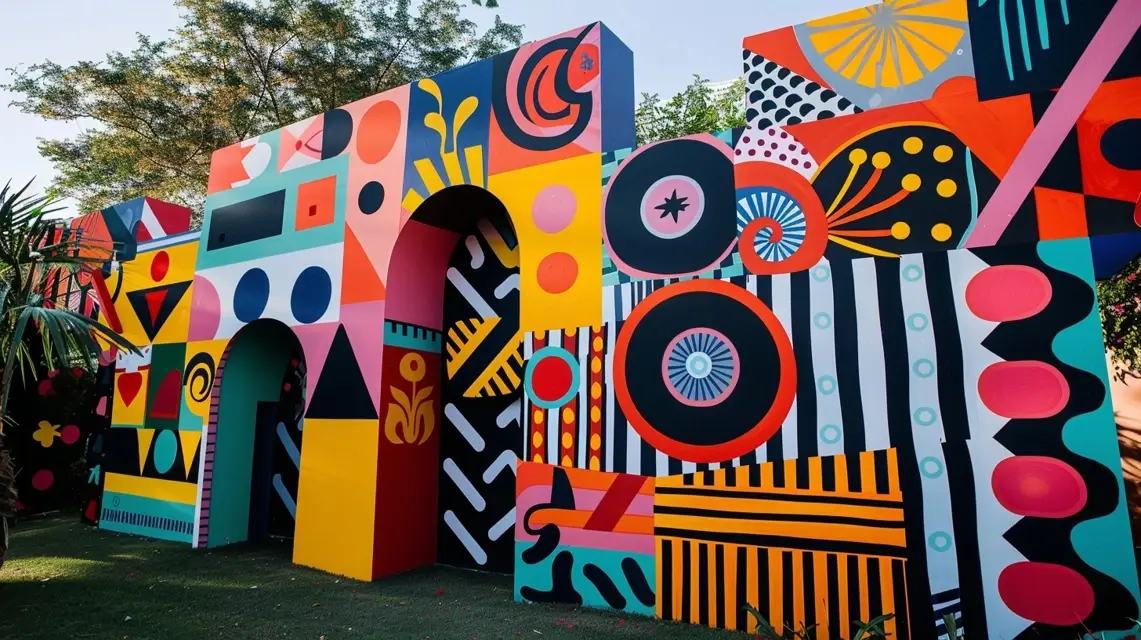
When it comes to customizing an arch backdrop stand, fabric and flowers aren’t your only options. Painted patterns can add bold personality, elegance, or artistic flair to your backdrop, making it one-of-a-kind. Whether you’re designing for a wedding, birthday, or corporate event, paint allows you to bring your vision to life in a way that feels both permanent and creative.
Why Use Painted Patterns?
Paint is one of the most affordable and versatile ways to customize an arch backdrop. Advantages include:
- Endless design options—geometric, abstract, floral, or themed
- Long-lasting finish that can be reused for multiple events
- Customizable to match event color schemes
- Creative freedom to experiment with textures and techniques
Materials You’ll Need
- Arch backdrop stand (wood, PVC, or metal with a paintable surface)
- Primer and paint (acrylic, spray paint, or latex)
- Painter’s tape or stencils for precise patterns
- Brushes, rollers, or sponges
- Sealant to protect the finish
DIY Painted Pattern Ideas
1. Geometric Shapes
Use painter’s tape to create triangles, diamonds, or stripes. Paint with bold contrasting colors for a modern look.
2. Ombre Fade
Blend colors from light to dark across the arch for a gradient effect that works well in romantic or elegant settings.
3. Floral Motifs
Hand-paint flowers or use stencils for a garden-inspired backdrop. Pair with minimal décor to let the artwork shine.
4. Abstract Art
Experiment with splatters, brush strokes, or irregular patterns for a creative and edgy vibe at modern parties.
5. Seasonal Themes
Paint snowflakes for winter, sunbursts for summer, or autumn leaves for fall celebrations. Perfect for themed events and holidays.
Step-by-Step Painting Process
Step 1: Prep the Frame
Sand and prime the surface to ensure paint adheres smoothly. Metal frames may require spray primer.
Step 2: Sketch or Tape the Pattern
Use stencils or painter’s tape to outline your design. This helps keep lines clean and professional-looking.
Step 3: Apply Base Coat
Start with a solid background color that complements your event theme. Let it dry completely before adding patterns.
Step 4: Paint Patterns
Add your chosen design using brushes or sponges. For stenciled designs, apply thin coats to avoid bleeding.
Step 5: Seal and Protect
Apply a clear sealant to protect your painted design from scratches and weather damage, especially for outdoor use.
Tips for Success
- Choose quick-drying paints for easier layering
- Test your design on scrap material before painting the stand
- Stick with 2–3 colors for cohesive results
- Store your arch indoors to maintain the paint finish
Where to Use Painted Arch Backdrops
Painted designs are versatile for:
- Wedding ceremonies with personalized motifs
- Birthday parties with bold themes
- Corporate events with branded patterns
- Photo zones at festivals or community gatherings
Next Steps
Looking for more customization options? Explore our guides on DIY fabric coverings and seasonal arch decorations to combine with your painted patterns.
Conclusion
Adding DIY painted patterns to your arch backdrop stand is a creative way to make your décor truly unique. With the right materials, a bit of planning, and a splash of creativity, you can transform a plain frame into a memorable centerpiece that enhances any event.
